Invoice Submission
Supplier Actionable Notification
Supplier Actionable Notification is a process whereby you can acknowledge purchase orders from World Vision and create invoices directly from the purchase order sent to your designated email address.
Creating an Invoice from Supplier Actionable Notification
STEP 1: Create Invoice from a purchase order sent to your mailbox.
To begin creating an invoice, click on the blue “Create Invoice” button from the purchase order that was sent to your email address.
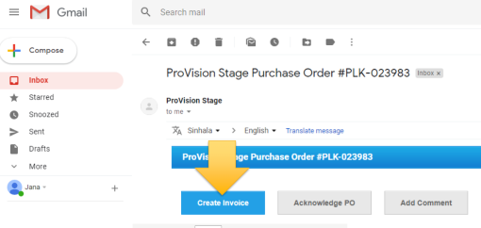
If the [Create Invoice] button is not available, that means your account is not set up for Supplier Actionable Network. Contact your World Vision procurement staff to have Supplier Actionable Notification invoice method enabled for your account.
STEP 2: Create Invoice window opens.
Note: All fields marked with the red * are required

Complete the following data fields:
- Invoice # - enter your invoice. The Invoice number in this field must match the invoice number in the pdf invoice that is attached.
- Invoice Date – enter date of invoice. Invoice date must also match the date on the pdf invoice that is attached.
- Payment Terms – this field is auto populated based on the payment term we have on record for your company
- Currency – provide the currency being invoiced.
- Shipping Terms – provide any relevant information on shipping terms
- Image Scan – Attach PDF copy of the invoice
- Supplier Note – Use this field to send comments or information to WV
- Attachments - Add supporting information including any shipping, insurance documents and 3 way bills, timesheet etc..
- All the information on the right side of the “Create Invoice” form is auto populated from the purchase order and records we have on file. Make sure to validate the information for accuracy.
If the Invoice From Address, Remit-To Address, or Ship From Address do not appear, you have not completed the e-invoicing set up. Click here to learn how to set up your account for Supplier Actionable Notification.
STEP 3a: Change quantity or amount of line item(s)
- All un-invoiced lines from the purchase order are automatically populated.
- Select the line you want to invoice
- Enter Quantity or Amount of the line item(s) to invoice
- Delete any extra line from the purchase order that is not invoiced at this time. You must to remove any line that is not being invoiced by clicking on the red “X” next to the line total amount.
IMPORTANT! Invoice line details must exactly match the purchase order line being invoiced.
STEP 3b – Line Level Taxation
If there is line level taxation, you can input the tax per line by checking the “Line Level Taxation” checkbox (see image below). A tax box will appear on the individual line where you will enter the Tax Rate.

STEP 4: Calculate Invoice Total by clicking on the [Calculate] button at the bottom of the invoice window.

STEP 5: Use Comment section at the bottom of the invoice window to send notes or messages specific to this invoice to with World Vision

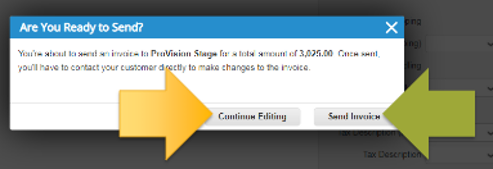
STEP 6: Submit your invoice
1. Click on [Submit] button to send your invoice to World Vision.
2. Once invoice is submitted, a confirmation notification box appears.
3. Once you click [Send Invoice] button: Your invoice is routed to World Vision Accounts Payable Department for processing